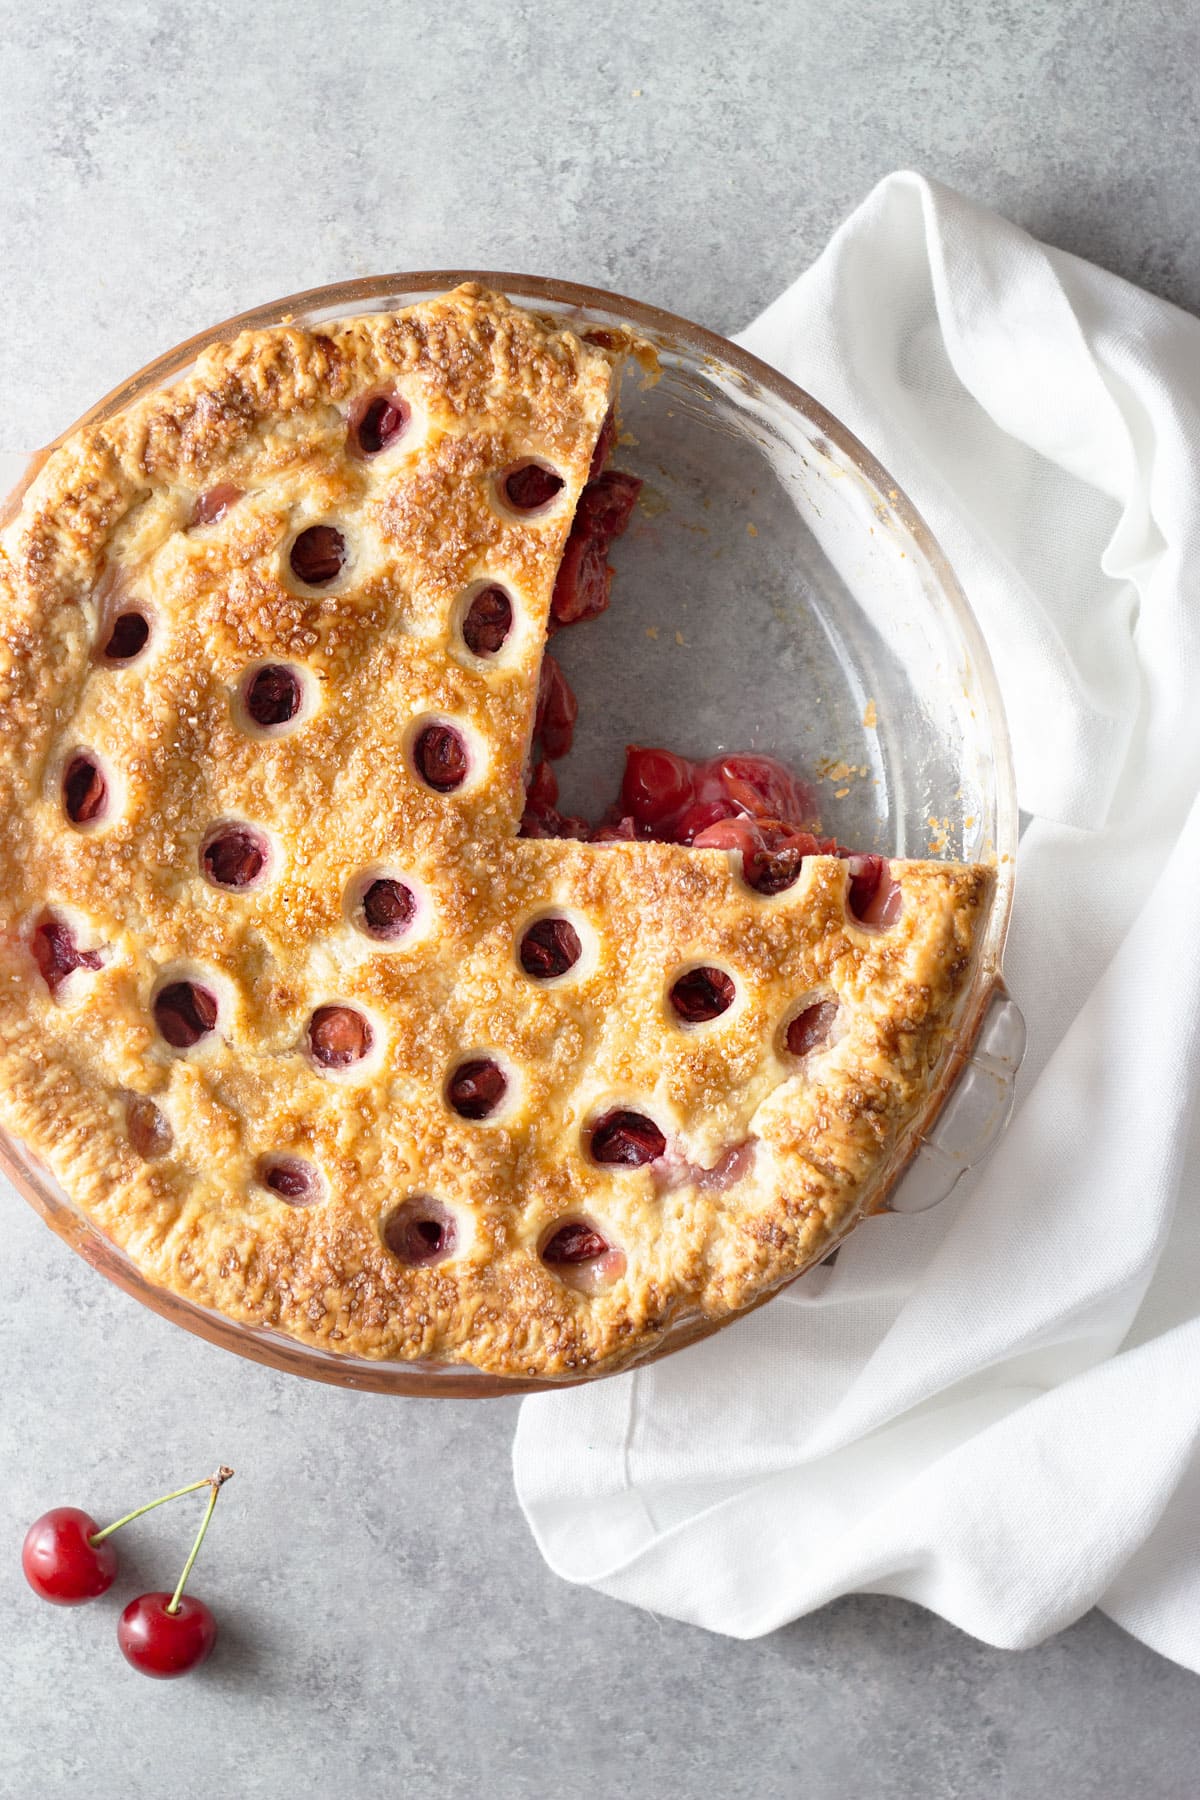
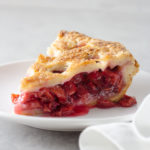
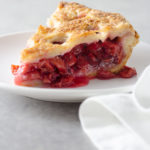
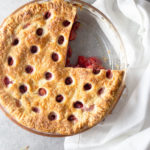
This is the perfect Sour Cherry Pie with a balanced tart and sweet filling. Plus, I provide tips to achieve a flaky all-butter crust.
Ingredient Notes
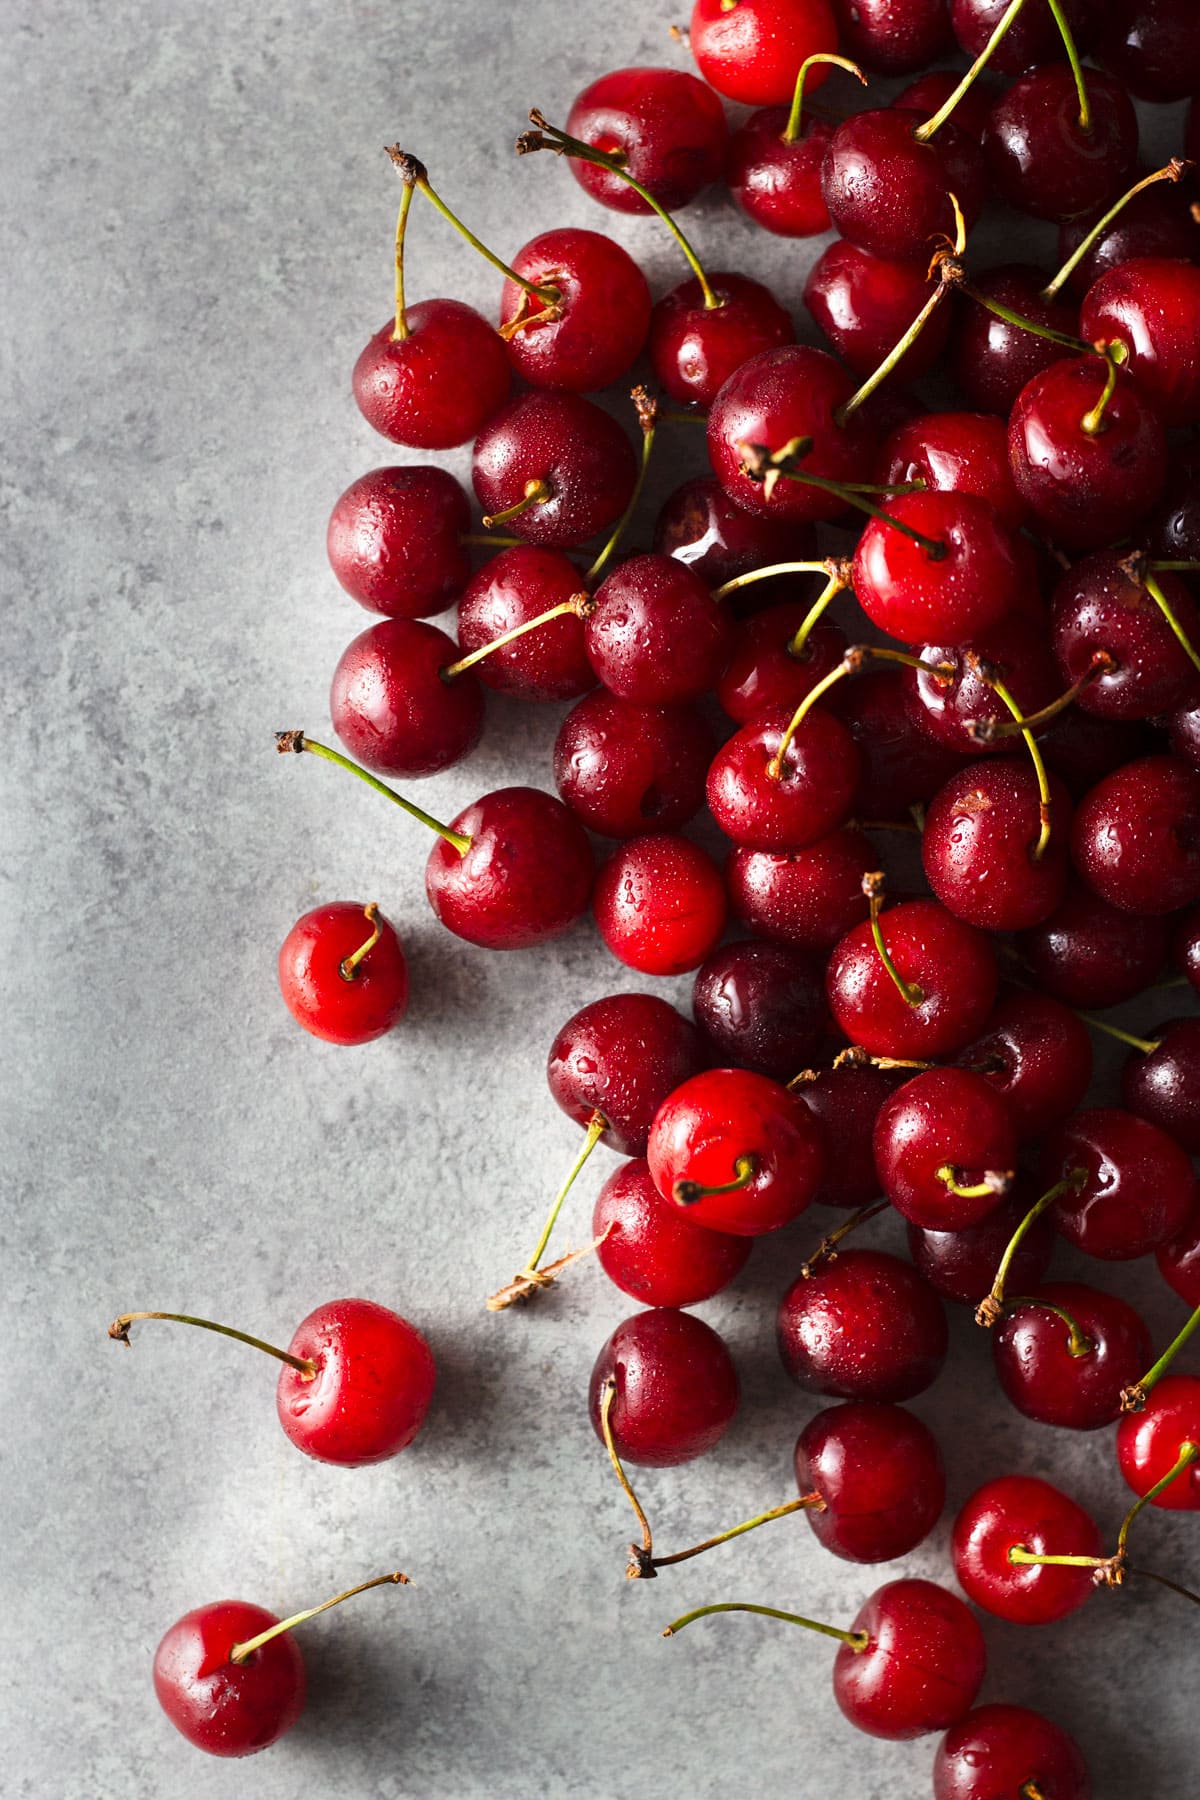
Sour cherries are delightfully tart, but do have a short season. They’re easiest to find in June and July, but can also be found frozen.
I’ve even seen canned sour cherries preserved in water, but am not sure of the quality or taste. If you can’t find fresh or frozen sour cherries, I’d probably fresh, red sweet cherries and less sugar, which I explain further in the recipe post.
As far as the crust goes, I like either apple cider vinegar or vodka added, because they tenderize the crust by decreasing gluten development. These ingredients are totally optional though!
You could always just use more cold water. The texture of the crust is more so affected by the way you handle it than anything else.
Sour Cherry Pie Recipe Steps
Always prepare the crust first when making pies. Mix together the dry ingredients. Then, toss in cubes of butter.
Use your hands to work in the butter. Flatten some pieces into thin disks, while leaving others as large as walnut halves.
Add the chilled liquids slowly. Hydrate enough so the dough comes together without any dry patches. Divide in two, and shape into discs. Refrigerate at least 2 hours or up to a couple days.
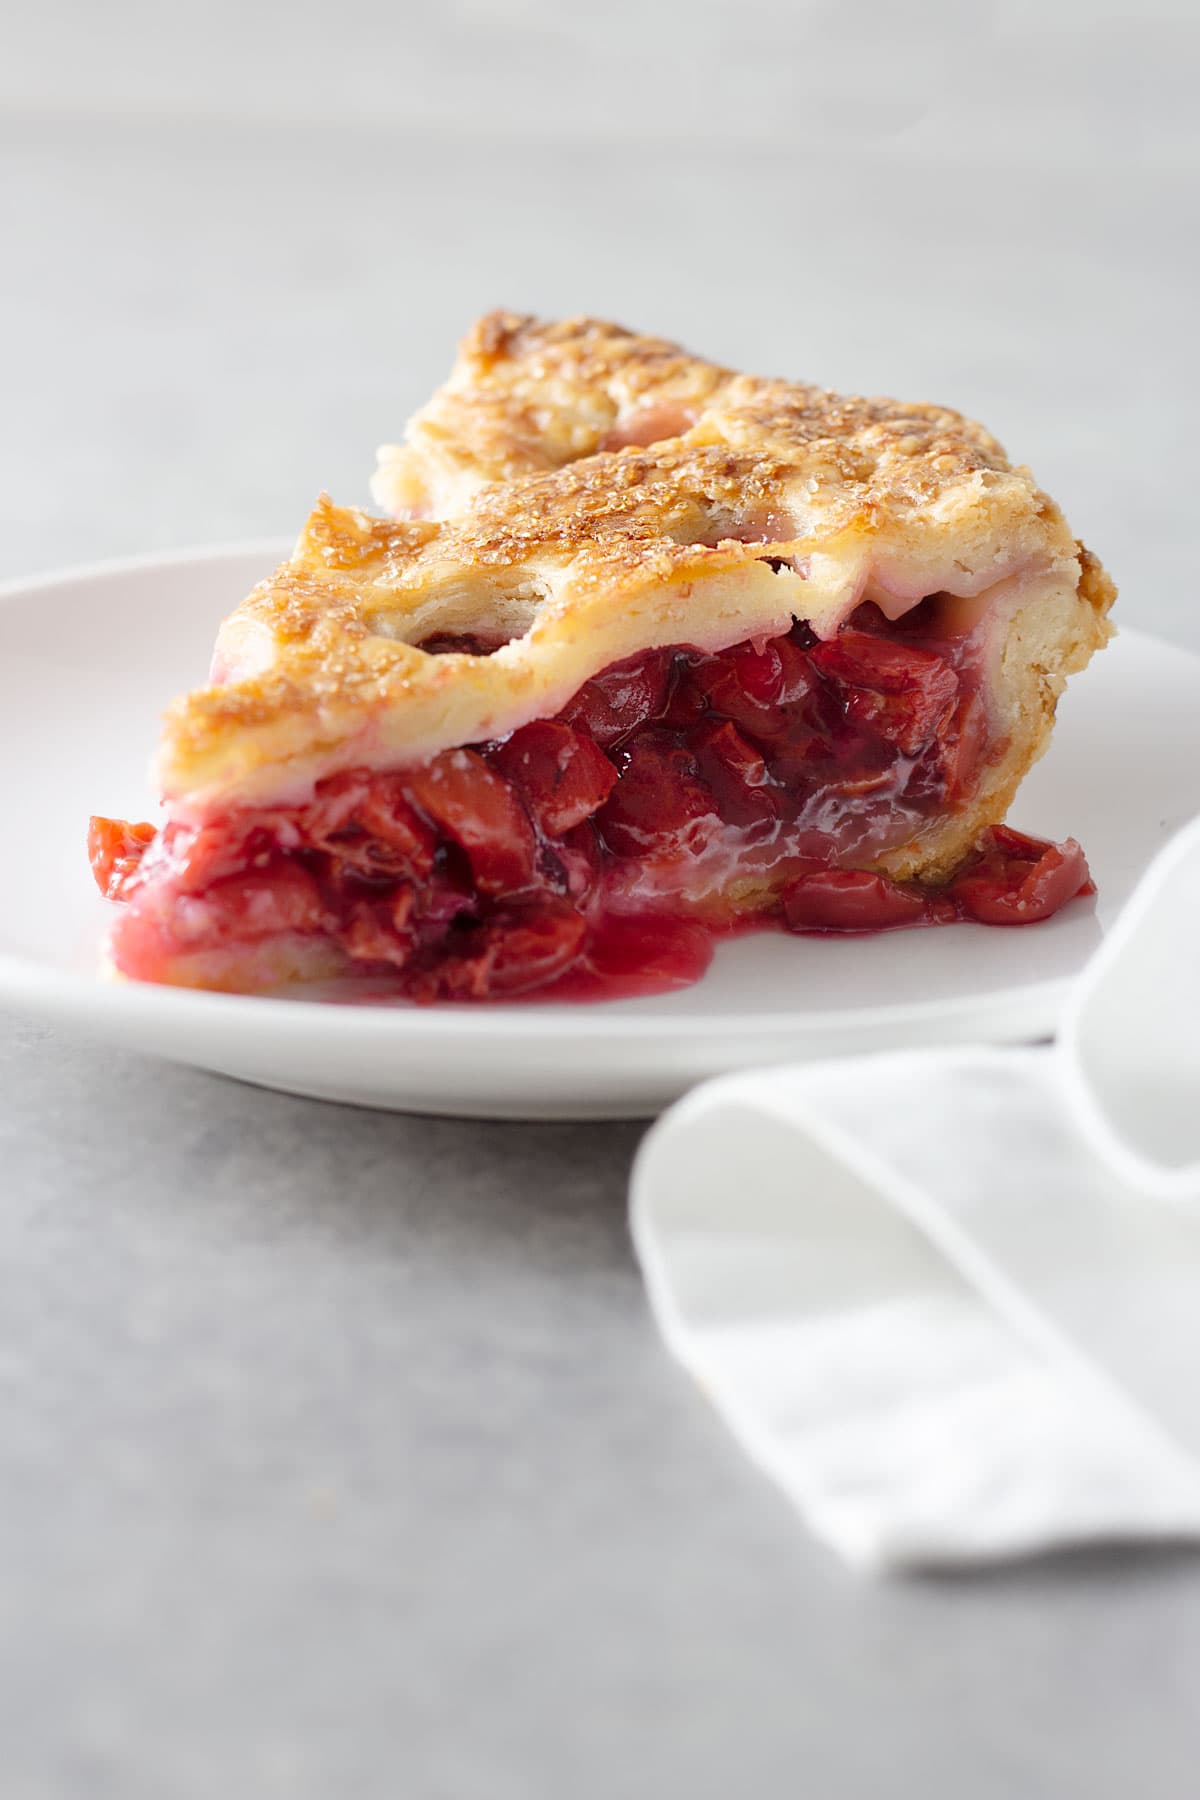
While the dough chills, prepare the filling. Cut the cherries. Toss with sugar to macerate. Separate out the juices and reduce them over the stove. Stir in the cornstarch and mix in the remaining ingredients.
As the filling cools, roll out the dough into two 13-inch rounds. Refrigerate, as needed. Preheat the oven with a baking stone or sheet tray on the center rack.
Assemble the pie. Pop it in the freezer to chill, and bake until the filling is bubbling and the curst is browned.
Tips for a Flaky Crust and FAQs
- Keep the pie dough ingredients cold. The butter should stay as cold as possible for the flakiest result. You can freeze your butter before incorporating it into the flour. If your ingredients get too warm during any stage of the process, simply place your bowl or piece of dough in the fridge until it’s chilled and easier to work with again.
- Reduce the fruit juices. The number one culprit of a soggy bottom is too much liquid in the pie. It’s incredibly important to follow of the instructions, macerate the cherries and reduce their juices. Sour cherries are particularly juicy.
- Cook the pie on a hot surface. I suggest preheating a baking stone or sheet tray to cook the pie on. This helps with quicker cooking and a well-browned, crispy bottom crust.
If you’re making a single crust pie, such as a cherry crumble pie, it’s always a good idea to blind bake the bottom crust. This allows for better browning and less liquid absorption.
You can certainly eat sour cherries without cooking or sweetening them. They have an appealing sweet-tart flavor.
This recipe is also available as a web story.
Related Recipes
- Strawberry Rhubarb Pie
- Blueberry Lavender Galette
- Pumpkin Meringue Pie
- Apple Crostata with Crumb Topping
- Cherry Balsamic Sorbet
- Brandied Cherry Sauce
If you make this recipe, please post a comment and rating down below. If you want to be notified every time I post a new recipe, subscribe to my blog and give me a follow on my social accounts: instagram, pinterest, twitter, youtube. See you next time!

The Perfect Sour Cherry Pie
- Total Time: 2 hours 45 minutes
- Yield: 1 pie, 8 servings 1x
Description
This is the perfect Sour Cherry Pie with a balanced tart and sweet filling. Plus, I provide tips to achieve a flaky all-butter crust.
Ingredients
Crust:
- 2 ½ cups all-purpose flour, plus more for dusting
- 1 tablespoon granulated sugar
- 1 teaspoon kosher salt or ½ teaspoon fine salt
- 2 sticks unsalted butter, cut into ½ inch cubes
- 1 tablespoon apple cider vinegar or vodka, chilled in fridge (or more ice water)
- 7 tablespoons ice water, or as needed
Filling and Assembly:
- 2 pounds sour cherries, halved and pitted (about 4 cups)
- 1 cup granulated sugar
- 4 tablespoons cornstarch, divided
- ½ teaspoon finely grated lemon zest
- ½ teaspoon vanilla extract
- ¼ teaspoon kosher salt or ⅛ teaspoon fine salt
- 2 tablespoons unsalted butter, cut into ½ inch cubes, chilled*
- 1 egg beaten with 1 tablespoon water, for brushing
- Demerara sugar, for sprinkling
Instructions
- Mix dry ingredients: Combine flour, sugar and salt in a large bowl.
- Work in butter: Toss in butter to coat. Rub butter into flour using fingertips to create some large, irregular pieces up to the size of walnut halves, and some thin, flat pieces. Work quickly to avoid overheating butter. Place in fridge for several minutes, as needed, if butter gets too warm.
- Add liquids: Drizzle over vinegar or vodka, if using, and 4 tablespoons of the ice water. Mix with fork or gently toss with your fingertips to create a shaggy mixture. Add remaining water 1 tablespoon at a time, as needed. Lightly knead and push together to form a dough. The dough should not be sticky nor dry. Do not overwork.
- Laminate dough: Divide the dough in half. Shape each half into a ¾ inch thick block. Divide 1 half into 4 equal pieces. Stack pieces on top of each other and press down to shape into a ¾ inch, thick disc. This will create layers of butter that become flakey when baking. Repeat with second half of dough. Wrap in plastic wrap. Refrigerate at least 2 hours or up to 4 or 5 days.
- Macerate and thicken juices: Place cherries in a bowl and coat with granulated sugar. Macerate for 20-30 minutes. Place cherries in a sieve over a bowl to strain out juices. Place juice in pan and simmer over medium heat for 10-15 minutes or until reduced to ¼ to ⅓ cup. Whisk 3 tablespoons cornstarch with a couple tablespoons of cherry liquid in a small bowl, and stir into juice mixture. Transfer to bowl with cherries and stir to combine. Stir in lemon zest, vanilla and salt. Cool completely to room temperature.
- Roll out dough: Remove dough from fridge and allow to sit on counter for 5-15 minutes or until warm enough to work with. On a lightly floured surface, roll dough about ⅛ to ¼ inch thick into a 13-inch round. Transfer to a 9-inch pie plate and chill in fridge. Repeat with second half of dough, and transfer to a parchment-lined baking sheet. Chill in fridge.
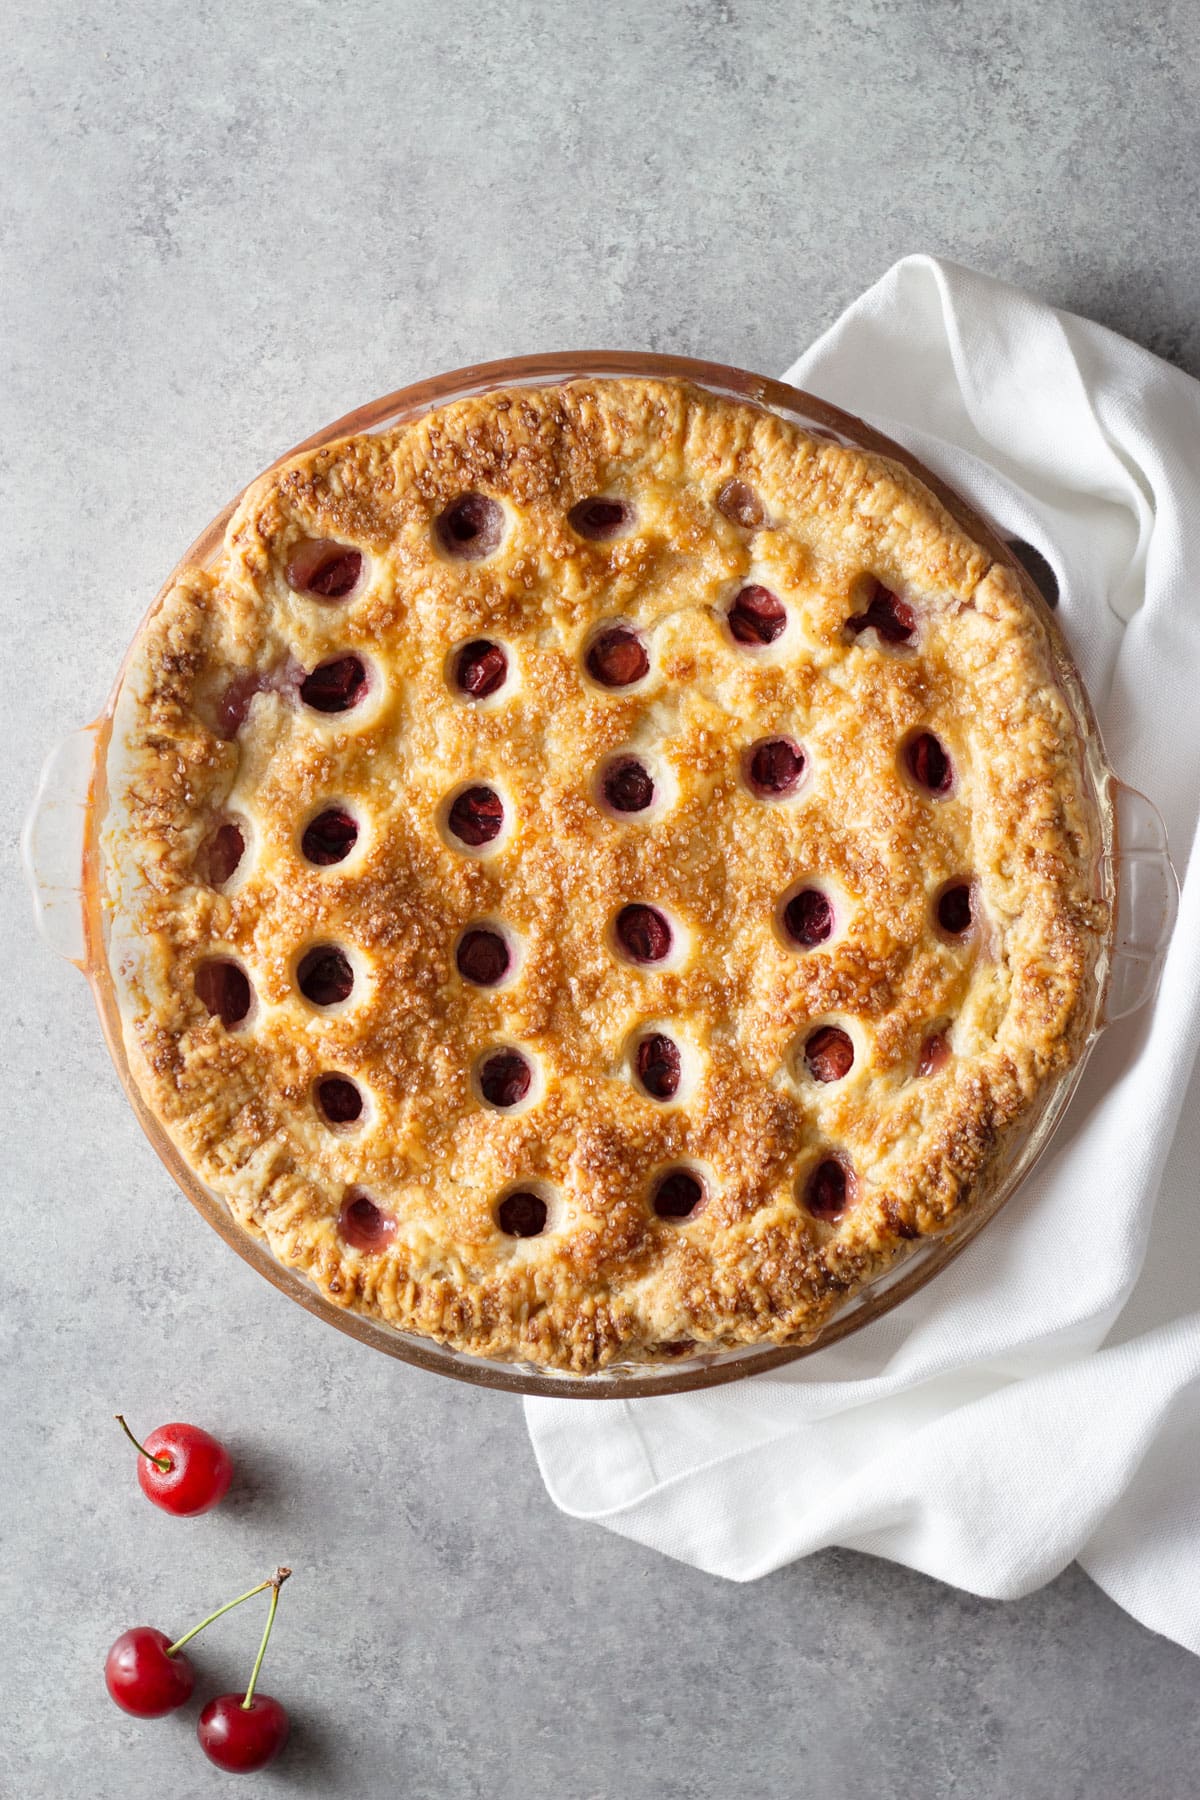
- Create “circular lattice”: When dough on baking sheet is chilled, transfer to a lightly floured surface. Punch out circles spaced 1 inch apart using an Ateco 808 round tip (or pastry tip of choice), leaving a 2 inch border. Otherwise create a traditional lattice, or keep whole and cut slits in before baking. Return to baking sheet and chill in fridge.
- Heat oven and assemble: Place a baking sheet in the oven. Preheat oven to 425°F. Remove both pieces of dough from fridge. Trim excess bottom dough so overhang is ½ inch. Sprinkle remaining 2 teaspoon of cornstarch directly on bottom dough. Pour in fruit mixture. Scatter over cubes of butter. Gently cover with top dough. Trim any overhang in excess of 1 inch from top dough. Fold top under bottom dough and pinch edges together. Mark rim of pie with tines of fork or crimp, as desired. Place in freezer for 10-15 minutes or until dough is firm.
- Bake pie: Remove pie from freezer and brush top with egg wash. Sprinkle generously with demerara sugar. Bake in center of oven on preheated baking stone or sheet tray for 20 minutes. Reduce oven to 375°F and continue to bake for 60-70 minutes or until bottom and top crust are well browned and filling is bubbling rapidly. Tent when needed to avoid over-browning the crust. Place on cooling rack and cool completely uncovered at room temperature. Slice and enjoy.
Notes
I suggest freezing the butter for the dough for 5 –10 minutes after cutting for the best results.
If you use regular sweet, red cherries instead of sour cherries, reduce the sugar to ½ cup plus 2 tablespoons.
To create ice water, simply place cold water and ice cubes into a measuring cup and let stand in fridge until ready to use.
It’s actually better to slightly overhydrate the dough than underhydrate it. You can add a little extra flour while rolling, but it’s difficult to add extra liquid later. An underhydrated dough will crack and be difficult to work with.
- Prep Time: 1 hour 15 minutes
- Cook Time: 1 hour 30 minutes
- Category: Dessert
- Method: Bake
- Cuisine: American
Nutrition
- Serving Size: 1 slice (⅛ of pie)
- Calories: 525
- Sugar: 34g
- Sodium: 161mg
- Fat: 24g
- Saturated Fat: 15g
- Unsaturated Fat: 9g
- Trans Fat: 0g
- Carbohydrates: 72g
- Fiber: 2g
- Protein: 6g
- Cholesterol: 84mg
The instructions don’t say where 2T butter, listed with filling ingredients, is used.
I’m so sorry for the late reply and for the missing step, Katharine! I just updated step 8. The butter cubes are supposed to be scattered over the cherry filling before placing on the top layer of dough. I realize I’m too late, but I do appreciate that you pointed out the error!
My family hates sour fruits so I’m always finding ways to use them up! I created a green tea cherry cake with the last punnet of sour cherries I got but this pie seems like an excellent way to change things up too! Now to convince my family to buy another punnet of sour cherries…
Hahaa, good luck with that! And thank you :). A green tea cherry cake sounds amazing too!
This looks so so delicious! Love the tips to avoid a soggy crust! Thanks
Thanks, Julie!
This is a beautiful looking pie. I love sour cherries.
Me too! Thank you, Kamini!